I got around to setting up tags for posts on my Strapi blog. I've been using Strapi for a few weeks now and I enjoy how easy it is to use. I knew I wanted a tagging system to organize my posts from the beginning, and now that I have almost 10 posts, I figured I better implement one before I get too many more.
The documentation wasn't as good for setting up categories in Strapi as I'm used to. Luckily it ended up being relatively easy. I figured I would write up my guide on how to set up categories on Strapi blogs.
Why Build a Tagging System?
As a Wordpress survivor, having categories or tags is a fact of blogging for me. Wordpress has both categories and tags, not to mention a million plugins to add more category and tag capabilities.
Regardless of the CMS, categories are good UX and helpful for SEO. They let users navigate your blog easily and get to the content that is most relevant to them. For instance, if my readers want to read specifically about React and not about my off topic ramblings, they can check out my "react" tag and not my "off topic" tag.
This system, when implemented correctly, also helps SEO by building up internal linking and giving the Google algorithm more info about the content.
How to Create Categories for a Strapi and React Blog
My site uses Strapi as the headless CMS and React for the frontend design. Implementing a tagging feature required updates on both sides. Here's the process I used:
Adding Relationships in Strapi
Strapi has built in functionality for this with relations. They even have a great article that goes into depth on relationships. If you are familiar with one-to-one, one-to-many, and many-to-many relationships in databases, this will likely be familiar. Somehow I've never thought about blog post categories this way, but it does make sense.
First I created a new Collection Type called Category. Now I have Personal Blog and Category.
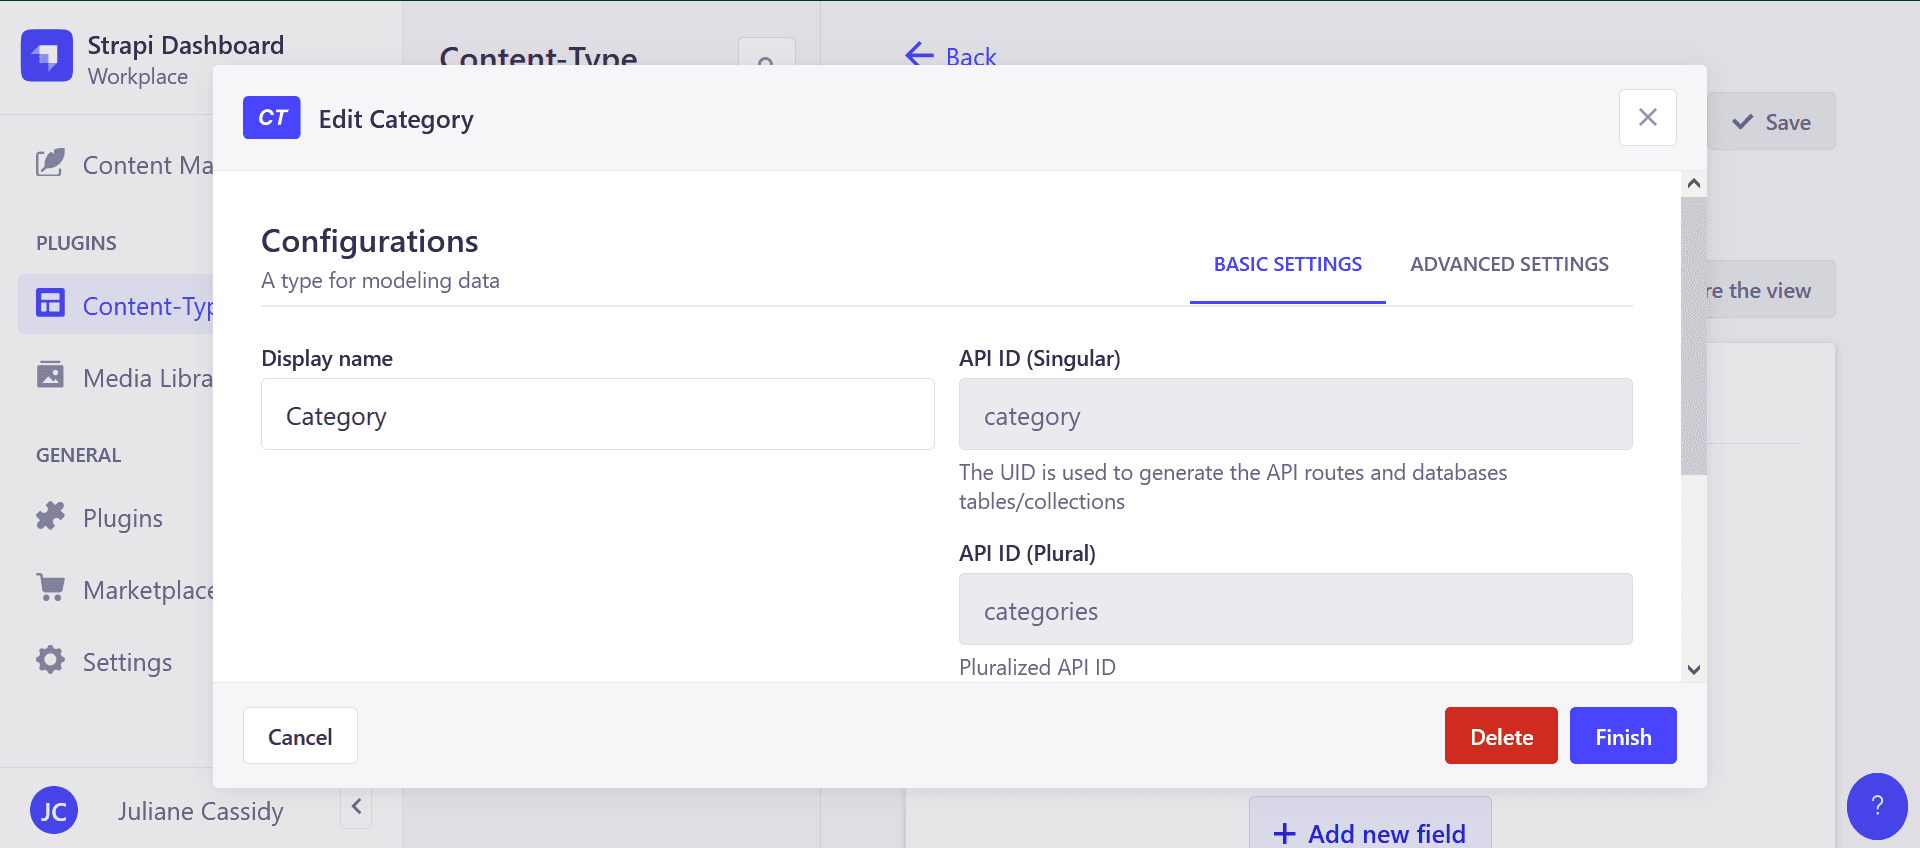
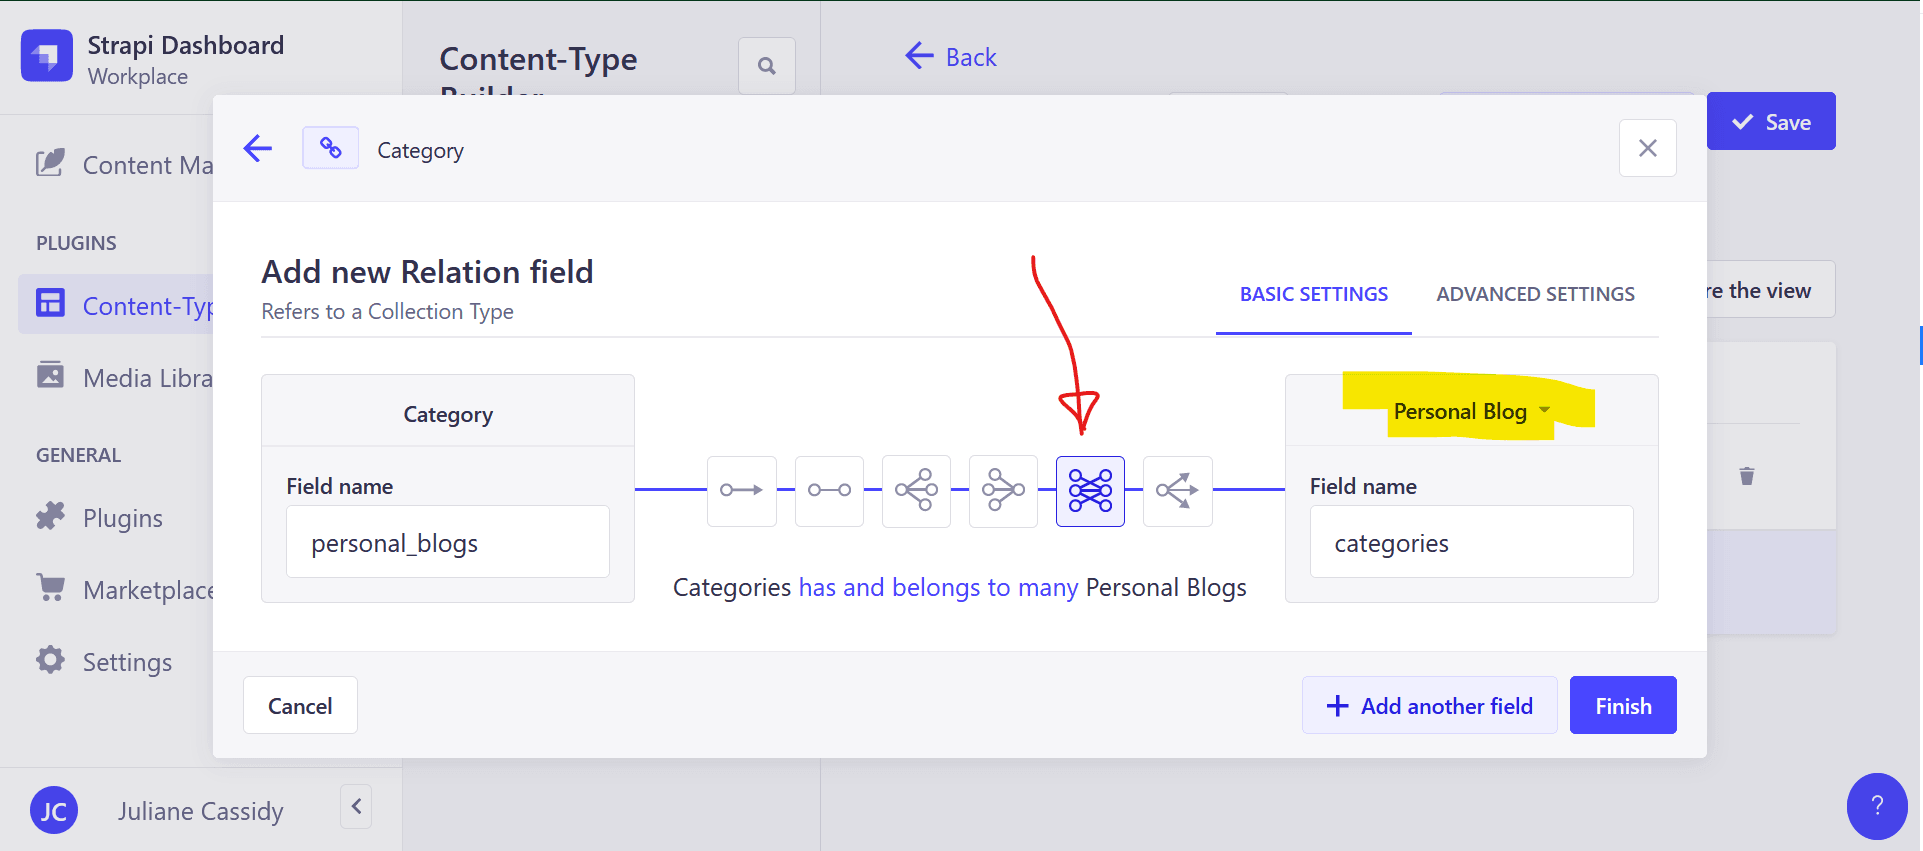
I added a text field to Category for the tag name. I also added a relationship field. This is the key part. personal_blogs and categories must have a many-to-many relationship because multiple posts can have the same tag and a single post might have many tags. In other words, pick the craziest icon and you're good to go.
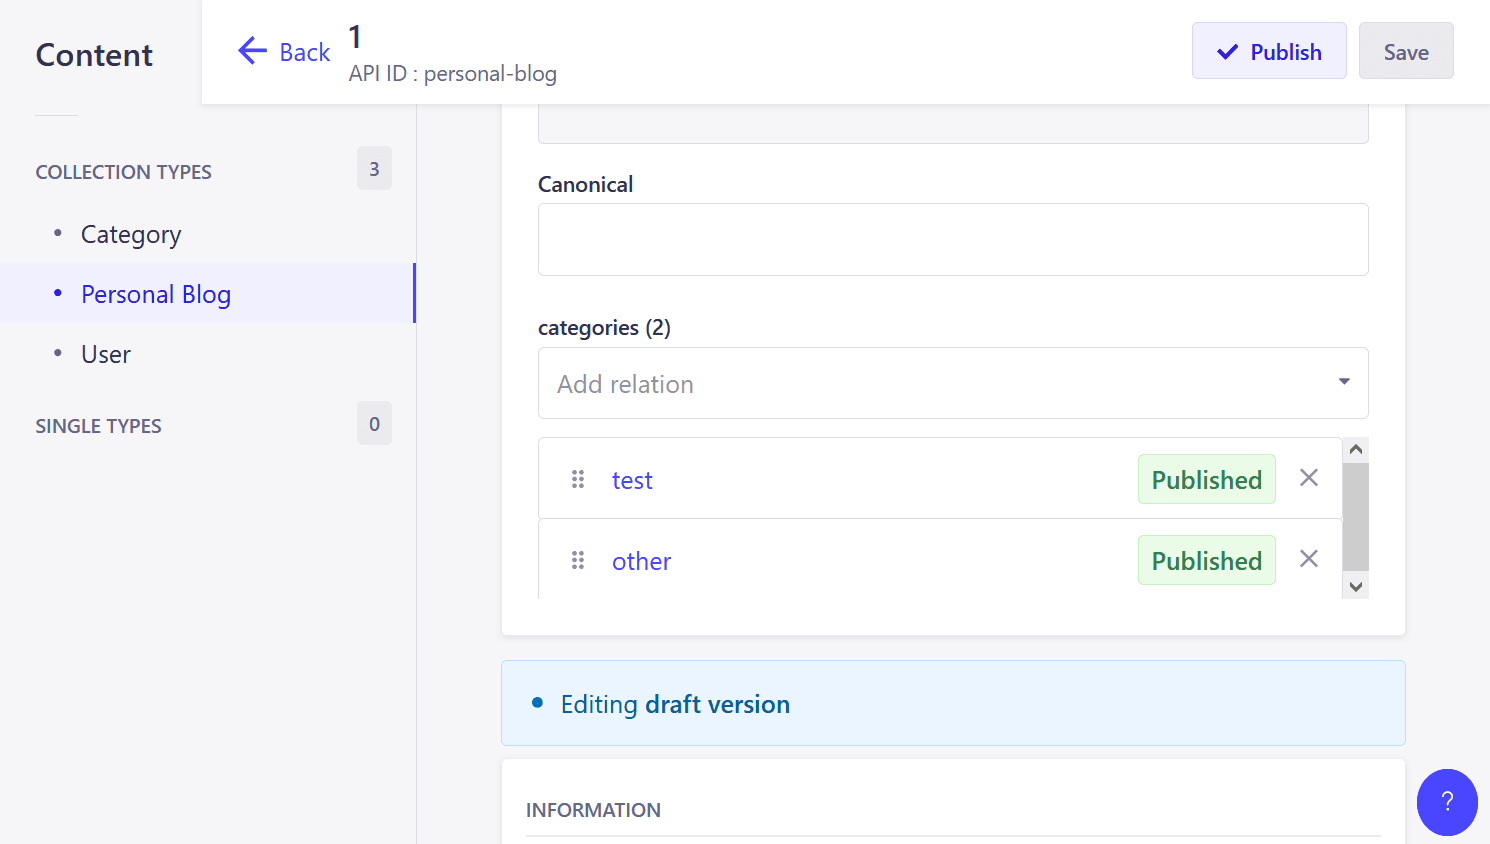
After saving my content view, I added two categories to test with: "test" and "other". I assigned them to one of my posts.
The final step is to update the permissions so I can access category data through the API. This is in Settings > Users & Permissions Plugin > Roles > Public. Since I'm only reading data to render on my front end, I only need find and findOne.

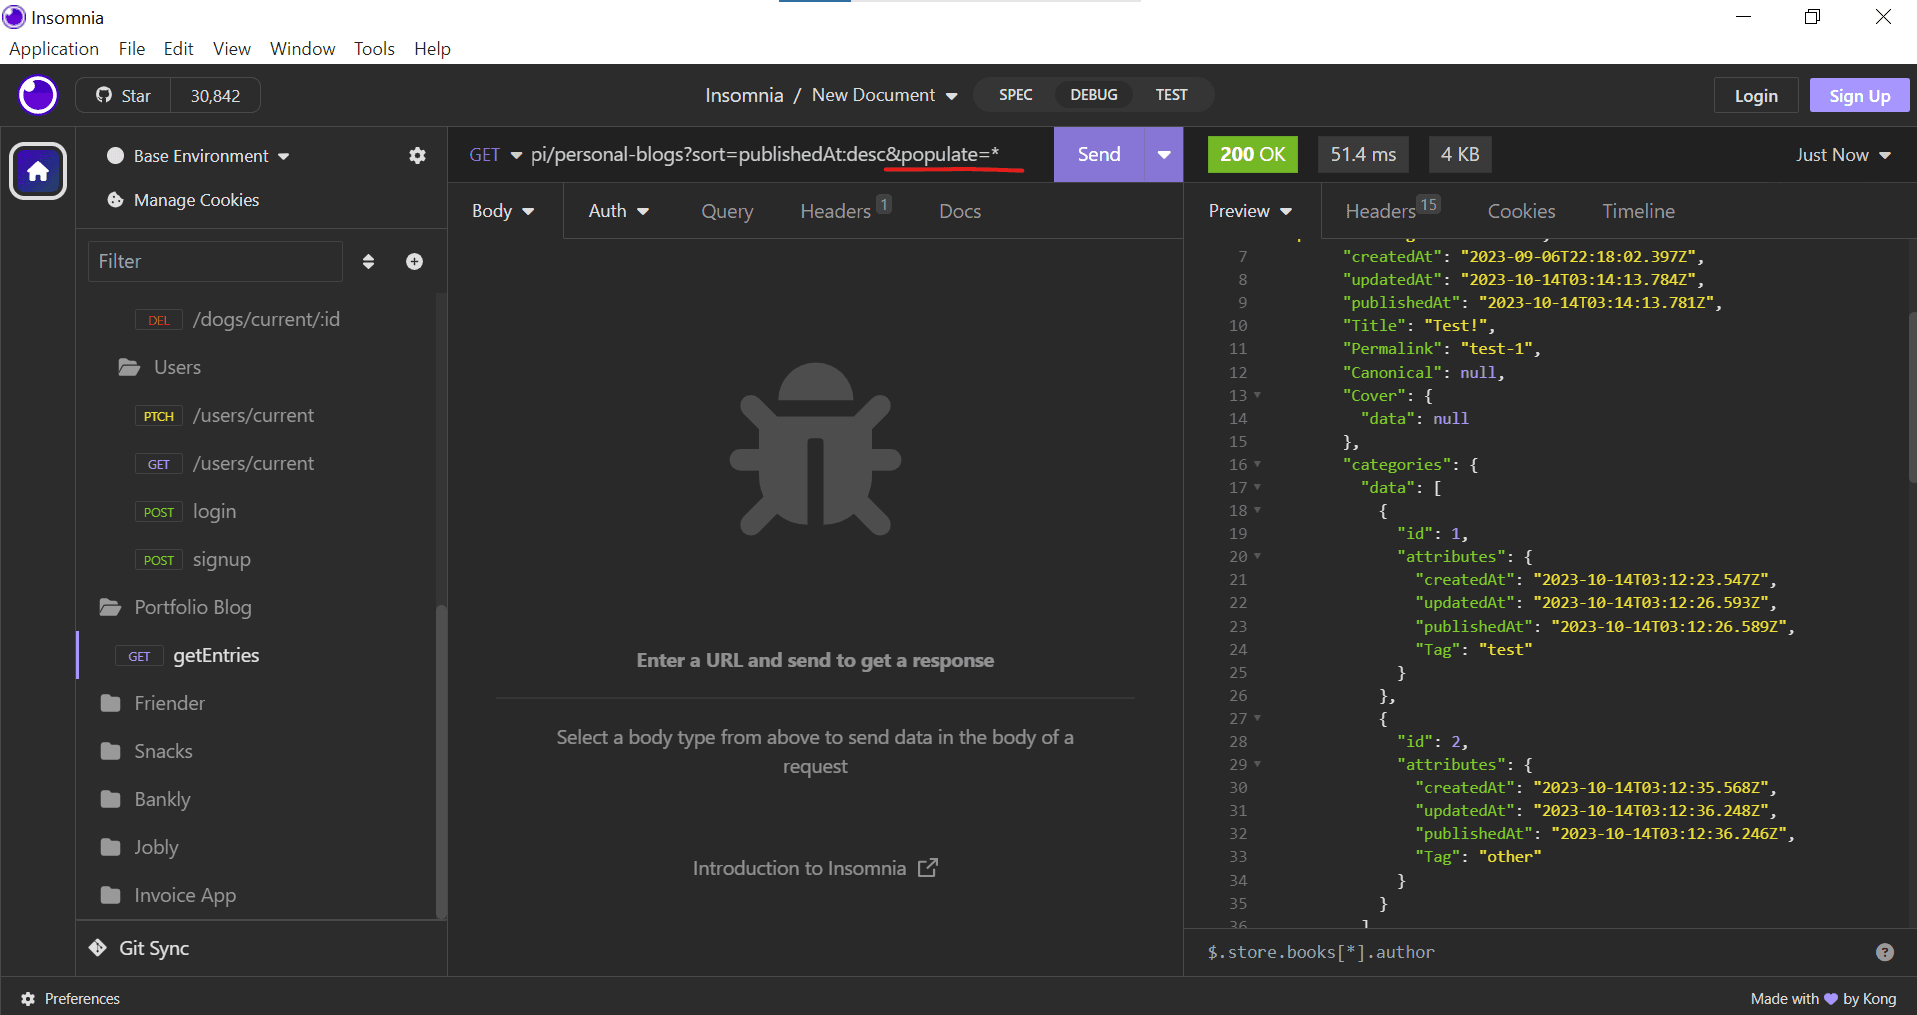
Next I tested everything was working in Insomnia. Per the Strapi API documentation, we have to add populate=* as a query parameter to give us one layer deep of relationship information. This was all I needed, but if you want nested categories, you'll have to peruse those docs.
Once I had it working in my dev environment, I deployed and built the tags out in my live environment.
The other important step after deployment is to go into Users & Permissions and the Public role once more to update the permissions for the Category API. It can be easy to forget since you already did it in development. Don't freak out that something broke in your code between the pull request and merge and spend an hour troubleshooting, which I would never do.
Building Out the React Components
This part will look different depending on how you are using tags in your frontend. I wanted the specific tags on the individual blog post and a list of tags on all of my blog pages. I also needed routes so that each tag can link to a page that has all of the posts with that tag.
First I added functions in my API file to handle the API calls to Strapi:
- This API call gets all my tags to populate the tag list in the sidebar.
    static async getTags() {
        const resp = await axios.get(`${STRAPI_BASE_URL}categories`);
        const tags = resp.data.data.map(tag => {
            const data = {
                id: tag.id,
                name: tag.attributes.Tag,
            };
            return data;
        })
        return tags;
    }
- I also have a function to get all posts tagged with one tag.
    static async getTaggedPosts(tag_id) {
        const resp = await axios.get(
            `${STRAPI_BASE_URL}categories/${tag_id}?${STAPI_RELATION_PARAM}`
        );
        const posts = resp.data.data.attributes.personal_blogs.data.map(post => {
            const data = {
                id: post.id,
                title: post.attributes.Title,
                permalink: post.attributes.Permalink,
                content: post.attributes.Content,
                date: post.attributes.publishedAt,
                };
            return data;
        })
        return posts;
    }
- Finally, I updated my existing function to get a post so I could also get its tags (with no regard for runtime or readability).
    static async getPost(id) {
        const resp = await axios.get(
            `${STRAPI_BASE_URL}personal-blogs/${id}?${STAPI_RELATION_PARAM}`);
        const post = {
            id: resp.data.data.id,
            permalink: resp.data.data.attributes.Permalink,
            title: resp.data.data.attributes.Title,
            content: resp.data.data.attributes.Content,
            date: resp.data.data.attributes.publishedAt,
            canonical: resp.data.data.attributes.Canonical,
            tags: resp.data.data.attributes.categories.data.map(category =>{
            // map over nested category data to create an array of tag objects
                    const tag = {
                        name: category.attributes.Tag,
                        id: category.id,
                    }
                    return tag;
                }),
            }
        return post;
    }
With those complete, I added a new route so I can access all posts with a tag:
<Route path="/blog/tags/:id/:tag" element={<BlogPostsByTag />}></Route>
I updated my Blog and BlogPost components to hold tags as pieces of state. I was already relying on the useEffect hook to fetch the post content, so I simply added a function to get the tags as well. This is the result:
function Blog() {
    const [posts, setPosts] = useState([]);
    const [tags, setTags] = useState([]);
    const [isLoading, setIsLoading] = useState(true);

    useEffect(function fetchPostsOnLoad() {
        async function getPostsFromApi() {
            try {
                const posts = await BlogApi.getPosts();
                const postsFormatted = posts.map(post => ({
                    ...post, "date": BlogApi.formatDate(post.date)
                }));
                setPosts(postsFormatted);
            }
            catch (err) {
                console.log(err);
            }
            setIsLoading(false);
        }

        async function getTagsFromApi() {
            // console.debug("getTagsFromApi");
            try {
                const tags = await BlogApi.getTags();
                setTags(tags);
            }
            catch (err) {
                console.log(err);
            }
        }
        getPostsFromApi();
        getTagsFromApi();
    }, []);
...
I also created a similar component to render posts by tag ID. It's the same as above, but I call BlogApi.getTaggedPosts(id) with the id collected with useParams.
The final piece is the display component for the tag list sidebar. This is a dumb component that Blog, BlogPost, and BlogPostByTag render with the tag list passed down as a prop. It creates a list of links:
function TagList({ tags }) {
    return (
        <div className="TagList">
            {tags.map(tag => (
                <div className="TagList-item" key={tag.name}>
                    <Link to={`/blog/tags/${tag.id}/${tag.name}`}>
                        {tag.name}
                    </Link>
                </div>
            ))}
        </div>
    )
}
And that's it in terms of functionality! I added some CSS and deployed all of my changes. The whole process only took a couple of hours and, to be honest, most of that was probably styling. I'm not sure if I'll need the Strapi relationships for anything else, but I'm glad they didn't end up being the hassle I'd anticipated.
What's Next?
I would like to come back and make my code more efficient. It's very unlikely that I will ever have more than a few hundred blog posts so it is unlikely to become a problem, but I would still like to figure it out. I also next want to add cover images to my blog posts. After that, it really is time get back to building some web apps I've had ideas for (and making a decision as to where I'm going to focus my learning over the next months; if you know how to keep yourself focused, let me know!).