A website built with Create React App will often lack features that can be useful for SEO. This is how I added meta tags, specifically canonical tags, when using Create React App and a headless CMS with react-helmet.
Filling in SEO Gaps with Create React App and a Headless CMS
When I learned React, my first thought was, "wow, this is a cool way to think about web apps." My second was, "this must be terrible for SEO." (Spoiler: with a little bit of effort and a few good decisions, React can be very SEO friendly.)
Since then, I have delved what shortcomings React had previously posed and what challenges remain. This is likely to be the first of several posts on the topic.
Many tools already exist to make a React site SEO friendly. Frameworks like Gatsby were built with the idea of delivering SEO performance and those pieces come built in. Next.js and Astro support SEO configurations readily.
Create React App is more barebones so it is missing many of those features. But my site is built with CRA and I'm enjoying working around what it gives me.
What are Canonical Tags?
Duplicate content is a huge red flag to Google. If you're content matches what is on other sites, it can get you flagged and blacklisted from search results for stealing content. If you have duplicate content in similar places on your own site, it can dilute your keywords and hurt your site's overall performance in search results.
My particular problem is that I will often post my content in multiple places: my blog, Medium, a few other blogging sites, etc. It's all my content, but I want Google to know that what is on my website is the original and theoretically the one I want to rank in search results.
That's where canonical tags come in. They tell Google, "Hey, this is the OG." So when the Google crawler stumbles on my post on Medium, Google knows that the one on my blog is the original and Medium is the copy. This helps it know where to rank everything and prevents me from looking like I plagiarized work.
Theoretically, at least. The fact of the matter is that Google can do as it likes and they will happily choose a different canonical if the algorithm thinks it has a better fit.
Adding Canonical Tags on a Create React App Site
After some thought, I decided to implement a canonical tag field in the CMS. This gives me the flexibility to decide by post if I want the on-blog version to be canonical or put the canonical somewhere else. This is especially important for things like guest posts since they can have specific requirements for which is canonical.
I'm using Strapi and I simply added another text field to my post content type where I will put the URL. This is quick and works for my limited publishing output. You could certainly refine it more if you wanted to.
Note that I am already using react-router to generate indexable URLs. This is a must for Google as each blog post needs to be tied to a URL for Google to index it. It is also a must for adding canonical tags since you will need a stable URL.
To render these canonicals in my front end HTML, I opted to use react-helmet . Canonical tags go in the <head> section of a page. Since I'm using create-react-app, I don't have control over each "page's" head section from within my BlogPost component. Other frameworks, like Gatsby and Next.js do, but it's interesting to see how to build this from scratch.
The first important bit of information is that when people say react-helmet now, they're referring to react-helmet-async. The original version caused memory leaks. Once you've got that piece correct, it's relatively simple to implement:
- Install react-helmet
npm i react-helmet-async
- In your
Appcomponent, importHelmetProvider, define thehelmetContext, and wrap all the components with<HelmetProvider>, like so:
import { BrowserRouter } from "react-router-dom";
import { HelmetProvider } from "react-helmet-async";
import Nav from "../components/Nav";
import RoutesList from "../RoutesList";

function App() {

  const helmetContext = {};

  return (<div className="App">
    <HelmetProvider context={helmetContext}>
      <BrowserRouter>
        <Nav />
        <RoutesList projects={projects} />
      </BrowserRouter>
    </HelmetProvider>
  </div>
  )
}

export default App;
- In the component that you want to edit the head section for, import
Helmetand add<Helmet>to your JSX with any metadata, links, or other head info you want:
import { Helmet } from 'react-helmet-async';
import ReactMarkdown from 'react-markdown';

function BlogPost() {

    return (
        <div className='BlogPost'>
            {post.canonical &&
                <Helmet>
                    <link rel="canonical" href={post.canonical} />
                </Helmet>
            }
            <h1>{post.title}</h1>
            <div className="BlogPost-date">Published on: {post.date}</div>
            <div className='BlogPost-content'>
                <ReactMarkdown>{post.content}</ReactMarkdown>
            </div>
        </div>
    )
}
export default BlogPost;
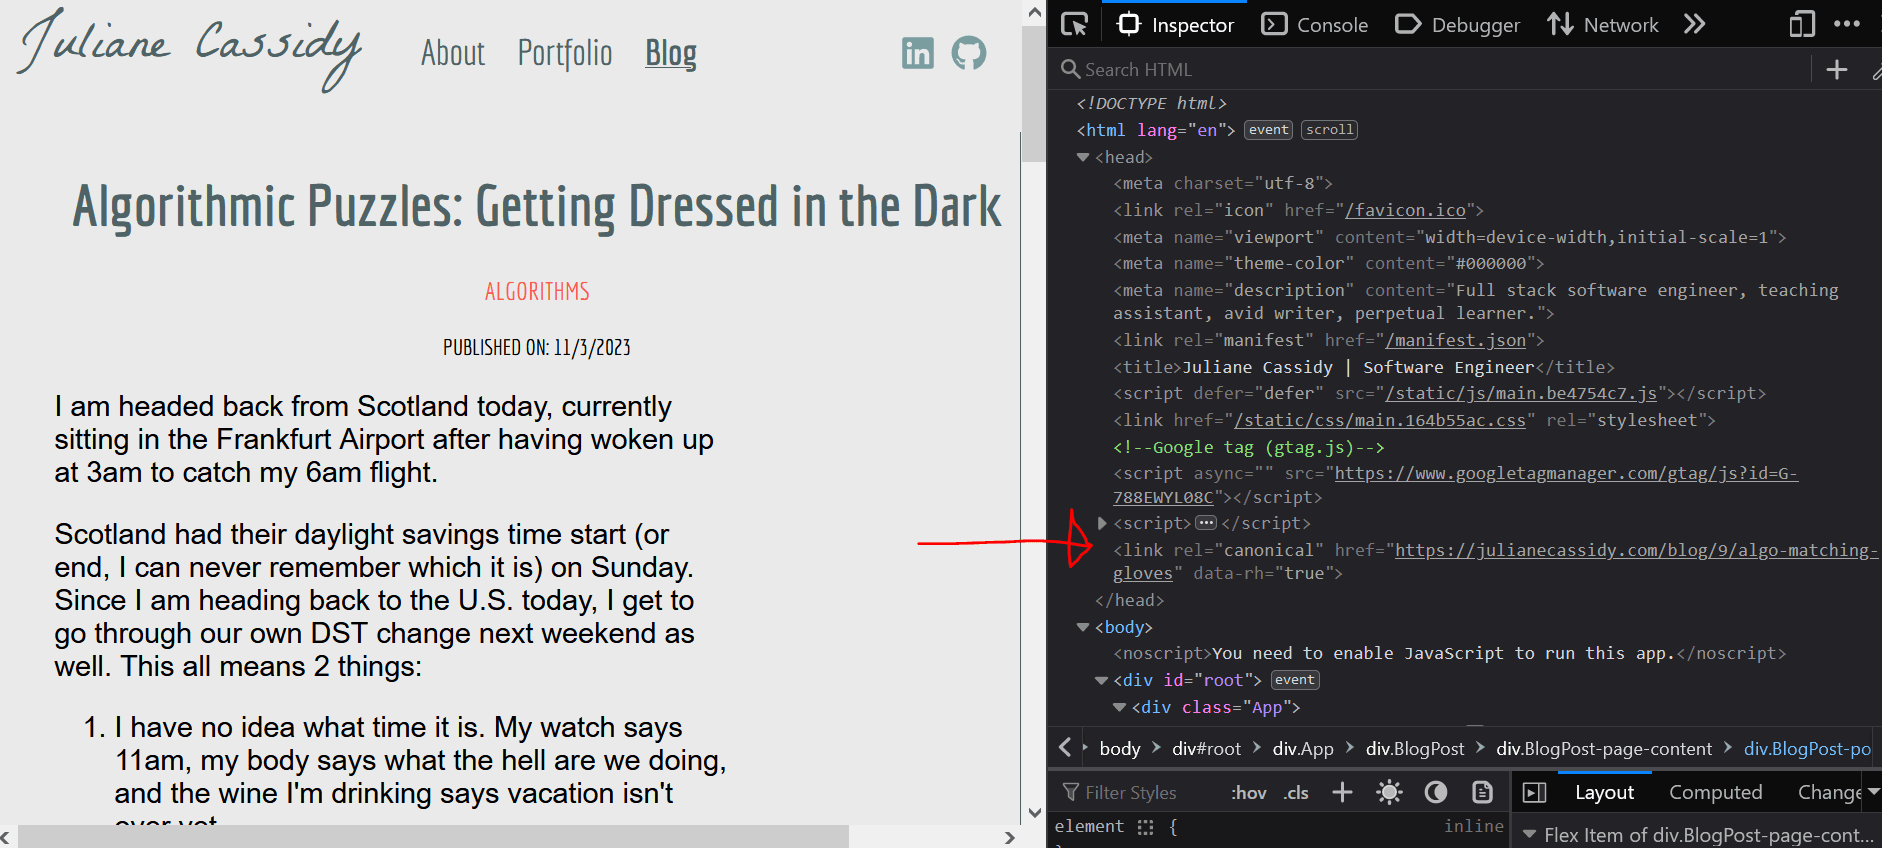
It's worth noting that data in Helmet uses standard HTML structure.
Now each of my blog posts has it's own canonical link.
Speaking of which, if you prefer to read content at Medium, find me over there. Most of my posts are in both places!